Prioritizing what to Caption.
Keeping in mind that Rome wasn't built in a day, here's my recommendations.- Start with your shortest video to learn the process. Your shortest video will provide a training ground to learn the process without it becoming overwhelming. Continue with captioning short videos as your refine your workflow.
- Next, caption your video with the most views. This will make your most popular content accessible to an even broader audience.
- If there is content that you regularly use or plan to use for an upcoming class, training, or presentation, caption that next. That way you will be able to display your captions with confidence knowing they are accurate and of good quality.
- Caption a video that perhaps hasn't gotten the expected audience you anticipated. Publishing closed captions not only makes your content accessible to a broader audience but it will improve your SEO.
- Finally, I recommend captioning all your new content before publishing it. My workflow is that I always upload my content as private and only make it public once I have published captions.
How to caption existing YouTube Content.
If your content has been uploaded in the last few years, it already has auto-generated captions. Even though these are typically terrible for understanding, they provide a good starting point. It is often easier to edit something rather than starting from scratch.
- Visit YouTube Video Manager and select your desired video. Edit > Subtitles & CC
- Choose English (Automatic)
- Edit
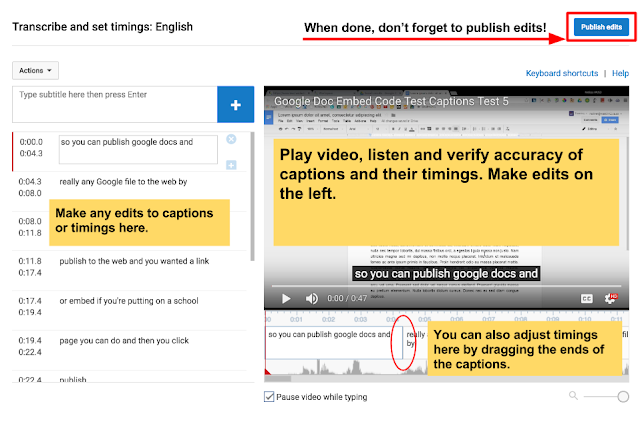
- Now you'll see your captions on the left and video on the right. Play your video, check for accuracy and make any necessary edits.
- Click Publish edits when finished.


No comments